Turnstiles from a hacker perspective - Part 2
Physical implants in turnstiles, replay attacks, and a brief introduction to the Wiegand protocol
Disclaimer
This Security Advisory is provided on an "as is" basis and do not imply any kind of guarantee or warranty. Your use of the information in this publication or linked materials is at your own risk. PRIDE Security reserves the right to change or update this content without notice at any time.
Introduction
Welcome, information security enthusiasts!
Before we begin exploring the topics of this second chapter, we would like to invite you to check out a video version of the same content. In the video, we visually address the key points and provide a dynamic experience. If you prefer to learn in a different way, click play below.
In the previous chapter, we identified vulnerabilities in the facial biometrics system, revealing the techniques used by malicious individuals to bypass these mechanisms and gain unauthorized access to physical environments. We observed that a turnstile had its own layer of physical security to restrict access to its internal environment, and we demonstrated lock bumping attacks and a design flaw that facilitated its opening.
In this chapter, we will explore the use of implants in turnstiles for conducting replay attacks, a method that allows a malicious individual to gain unauthorized access by impersonating another person. To accomplish this task, we will take a look at the Wiegand protocol. It is worth noting that none of the topics covered in this series are new or unprecedented, but the combination of these attacks could be useful in a real attack and have a significant impact on the security of the environment.
Physical implants in turnstiles
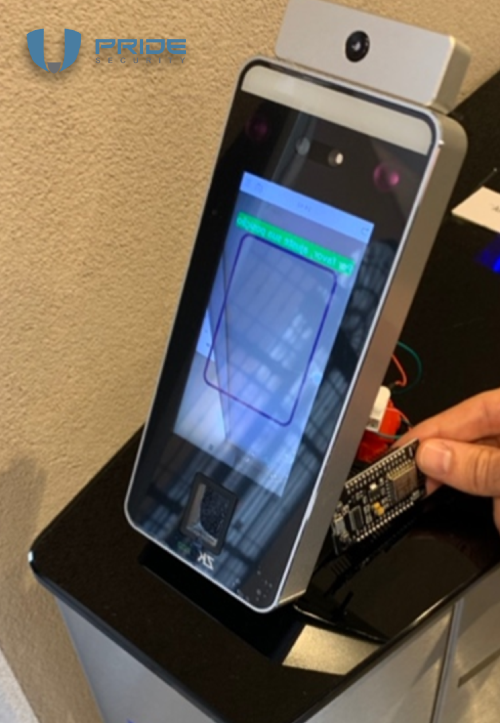
Previously, we briefly discussed the topic of implants, which can be inserted either on the exterior or interior of the turnstile. Depending on the chosen location, detecting these implants can be a trivial task for trained eyes. To illustrate the attack, we placed the device in a visible area, behind the facial recognition module of ZKTeco.
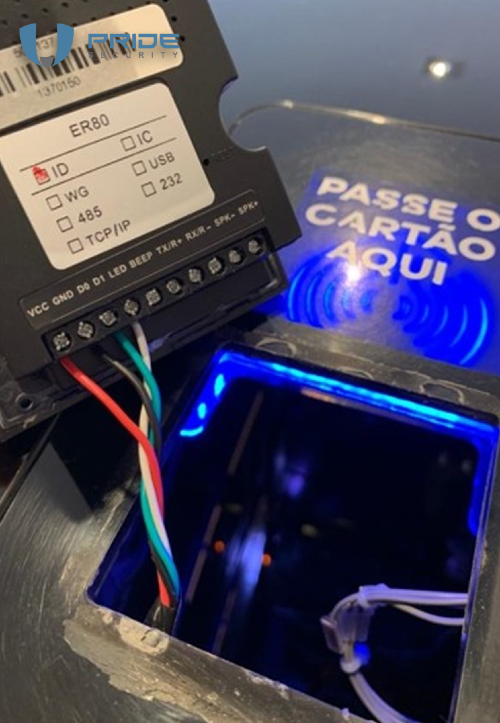
However, finding it inside the turnstile is not a trivial task, imagine it installed in the wiring inside the turnstile that connects the RFID reader.
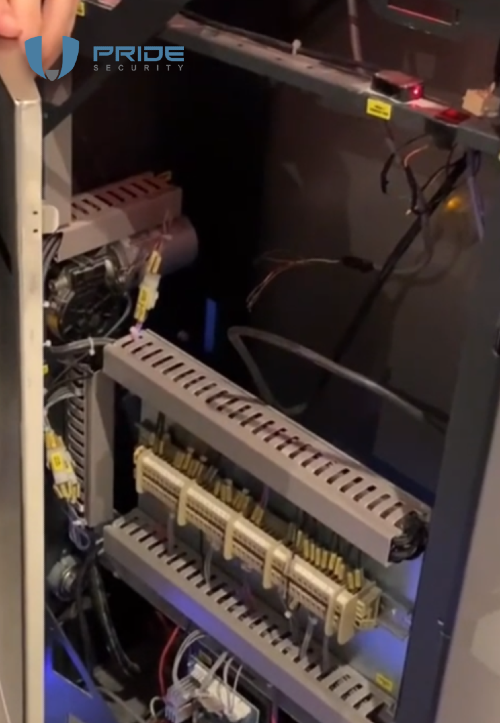
An alternative would be to install the implant on the inside of the turnstile, using one of the attacks explained in the first chapter. As shown, there is enough space to position it internally in a stealthy manner. Do you believe identification is trivial? :)
The importance of implants for conducting replay attacks
At this point, one might be wondering:
"Why insert an implant?"
The goal is to carry out the old and well-known replay attack, which essentially allows one to open the turnstile in an unauthorized manner, whenever the attacker wishes. To do this, after the implant is inserted, it is necessary to wait for someone to pass through these turnstiles and be successfully validated. Afterwards, simply resend these data, and the turnstile will open as if by magic. Voilà!
The device is strategically implanted to intercept communication, similar to a MitM (Man-in-the-Middle) attack.
The process begins with the collection of the desired data for later resending, this being the moment when the implant reveals itself as a crucial tool.
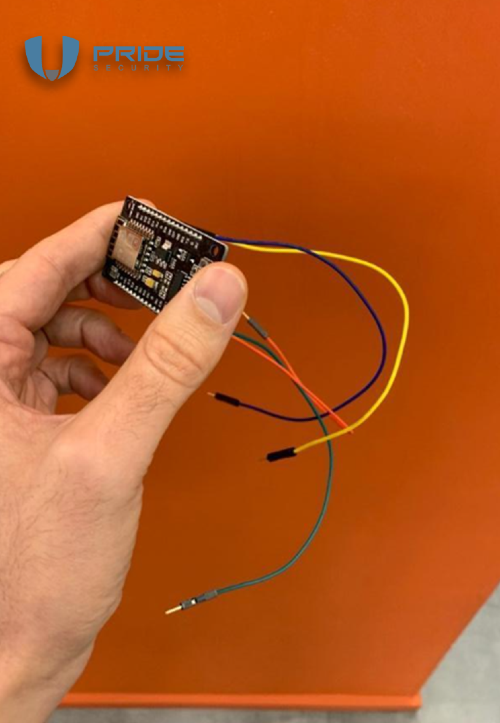
Inside the ZKTeco facial recognition module, a small device called NodeMCU was installed.
This type of implant is not exclusive to turnstiles; it can be used in a variety of devices. Virtually any system that communicates via the Wiegand protocol becomes a potential target. This implant can be installed in various access control systems, such as facial recognition modules, fingerprint readers, among others, commonly found in corporate environments.

It's common to encounter these access control devices scattered throughout the company, safeguarding sensitive areas such as the server room and the boardroom. The extent of this attack becomes apparent when considering the variety of locations where these systems are present. To illustrate more clearly, a practical example involving a turnstile will be analyzed.
As mentioned earlier, the turnstiles in question have multiple layers of security, capable of performing facial recognition even on users wearing masks. Additionally, these turnstiles also incorporate features such as temperature measurement and badge identification, expanding their validation capabilities.
By inserting the implant into the turnstile, it's possible to simulate the entry and exit process of an ordinary employee, demonstrating that the turnstile continues to operate normally. Validation occurs seamlessly, authorizing access as if nothing were out of the ordinary.
Figure 6 - Simulation of an employee entering and leaving
The NodeMCU plays a pivotal role in this attack, creating a dedicated wireless network for remote management of the implant. Through a mobile device, it's possible to access the implant management system via a specific IP address, which redirects to a web application developed specifically for this purpose. In this application, it's possible not only to view but also to manage the information captured during the entry and exit simulation. These data, stored in binary format, represent the authentication performed through the Wiegand protocol.
To execute the attack, the binary information is copied into the NodeMCU management software. Then, simply clicking the "transmit" button initiates the process. This action instructs the NodeMCU module to retransmit the previously captured binary data. As a result, the access control system authenticates the user, recognizing them as the legitimate owner of the data, and allows the turnstile to open. It's as if magic happens before your eyes, with the turnstile opening without any suspicion.
Figure 7 - Applying the replay attack with NodeMCU
Inserting the implant into the turnstile - like a ninja 🐱👤
In the first chapter of this series, we discussed techniques for opening the turnstile in an unauthorized manner and how to access its interior through the RFID reader.
At some point, one might wonder how a real attacker would insert the implant into the turnstile without raising suspicions, especially in environments with security personnel and security cameras. Although the focus is not on telling stories about physical security testing, a very useful and still effective approach is to present oneself dressed as an employee of the company responsible for the maintenance of the turnstiles, since these individuals are rarely approached, and the familiar uniform tends to instill trust in coworkers. Other approaches may include the use of social engineering or gathering information on strategic timings, opting for moments when security might be more relaxed, such as during peak traffic times or shift changes.
In the example below, an animation is presented in which it's possible to obtain information such as details of the uniform worn by the maintenance company, identification through badges, and the equipment commonly used.
Figure 8 - PRIDE Security staff in Wolpac uniform
A brief introduction to the Wiegand protocol
Now that we have learned how to place the implant without getting caught by security and witnessed the attack in execution, let's delve a little into its operation. The attack we conducted exploits the Wiegand protocol, transmitted in plain text. The term "Wiegand" is a tribute to John Richard Wiegand, a German-born inventor who discovered what became known as the "Wiegand effect" - a nonlinear magnetic phenomenon, even registering a patent in the 1970s. Although the original card readers are no longer produced, the hardware interface and format are still widely used.
Although other options are available, the Wiegand protocol remains one of the most commonly used worldwide, being widely employed in many access control systems and their integrations. The operation of the communication is quite simple. At its core, the protocol utilizes two data wires, known as D0 (Data 0) and D1 (Data 1), along with a Ground wire and a VDC (Volts Direct Current) line. In the illustration, the VDC is 12 volts.
Figure 9 - Wiegand wiring
The VDC is not limited to 12 volts; implementations may vary, utilizing different voltages. It is worth noting that it is important to consider the voltage of the implementation, as the NodeMCU can be damaged if the voltage is not suitable. In these cases, following the suggestion of our team member Lucas Teske, it is advisable to use a bidirectional logic level converter. This tip can prevent several NodeMCU from being damaged! 😊
Operation of the Wiegand protocol
You might be wondering, how does the protocol work? Just to illustrate the operation, let's imagine an implementation where the VDC uses 5V. When no data is transmitted, both D0 and D1 are at a high level, meaning they are receiving 5 volts of voltage. When we want to send the bit 0, we basically put D0 at a low level, while D1 remains at a high level, i.e., receiving 5 volts of voltage. If we want to send the bit 1, the opposite occurs: D1 is put at a low level, while D0 remains at a high level, receiving 5 volts of voltage. In this way, we can transfer information by defining the bits as zero or one.
Figure 10 - Example of how the protocol works
In the animation that was demonstrated, 26 bits are used, which is the original format. However, it is important to note that there can be variations between implementations, meaning, in real tests, it is possible to find this format with a different number of bits. In the original 26-bit standard, basically, 24 bits are allocated to data, and the remaining 2 are parity bits. The structure is as follows: it starts with a parity bit, followed by 8 bits of Facility. Then, there are 16 bits of identification and, finally, another parity bit. In other words, the first parity bit is responsible for calculating the 12 bits that follow it, and the last parity bit calculates the 12 bits that precede it.

In the example we presented, we used a NodeMCU, which is equipped with the ESP8266 chip. Moreover, these devices are quite affordable in terms of price. If you wish to acquire one, you can find it on Chinese websites, such as AliExpress. At the time this test was conducted, these devices were available for less than $5. As for the software we used on the NodeMCU, that is, the code, it is an adapted version of the software called ESP RFID, available on GitHub.
There are numerous exciting opportunities with the NodeMCU. In a context of access control that requires PIN codes and rarely receives visitors, we can automate a brute force attack on the PIN. We can even customize the code to initially test the most common PINs, followed by patterns representing well-known letters or symbols, enhancing our chances of success more quickly.
Did you like the suggestion of this attack using the NodeMCU in this chapter? Want more details about this attack? Check out our video!
A valuable tip
Before we conclude, we want to share a valuable tip. In our practical tests, we noticed that some devices do not follow the identification printed on the circuit. Surprisingly, in some cases, the markings on the circuit differ significantly from what is indicated in the manufacturer's manual. Therefore, it is highly recommended to always have a small multimeter on hand. This will ensure that you do not miss the opportunity to successfully perform an implant, even when the information on the circuit or in the manual is incorrect.

Conclusion
We have reached the end of this chapter, addressing various attacks such as the use of physical implants in turnstiles, replay attacks, and a brief introduction to the Wiegand protocol. In the next chapter, we will explore the internal features of turnstiles, such as RJ45 interfaces, access to the logical network, and attacks on management systems.
If you haven't read the first chapter, you can access it through this link.
The journey through turnstile security continues! Stay tuned!
Acknowledgements
| Name |
|---|
| Cleriston Freitas |
| Felipe Sanches |
| Leonardo Paiva |
| Luan Pedersini |
| Ricardo B. Gonçales |
| Wendel G. Henrique |
About PRIDE Security
PRIDE Security is a company specialized in information security that focuses on technical excellence and personalized services. Founded by information security experts, we have worked in various types of projects, from ATM (automated teller machines) penetration testing to national security projects.
Composed of an experienced team of more than 15 years in the market and with technical excellence proven by national and international technical recognition, PRIDE Security sees in each project a new challenge to deliver more than expected.
As proof of international technical recognition, our professionals are constantly approved or invited to lecture on security events around the world. We cite below some examples of congresses, conferences and seminars focused on information security, which we participate as lecturers or coordinators of the technical groups:
- Blackhat – USA
- RSA Conference – USA
- Defcon – USA
- ToorCon – USA
- Blackhat – Europe edition
- OWASP AppSec Research – Europe edition
- OWASP AppSecEU09 – Europe edition
- Troppers – Germany
- H2HC (Hackers 2 Hackers Conference) – Brazil
- YSTS (You Sh0t The Sheriff) – Brazil
In addition to lecturing at major security events around the world, our team of experts are also responsible for writing various papers, co-author of offensive technology patent registered in the United States of America (US8756697), finding and publishing security vulnerabilities in famous software such as Sun Solaris, FreeBSD / NetBSD kernel, QNX RTOS, Microsoft ISA Server, Microsoft Word, Adobe Flash, Adobe PDF, among others.
Many organizations of all sizes concerned with information security rely on PRIDE Security. If you desire, we will be pleased to connect you with our customers to share about their experience with our services.